Server configuration
You can configure various server parameters from the System Administrator portal.
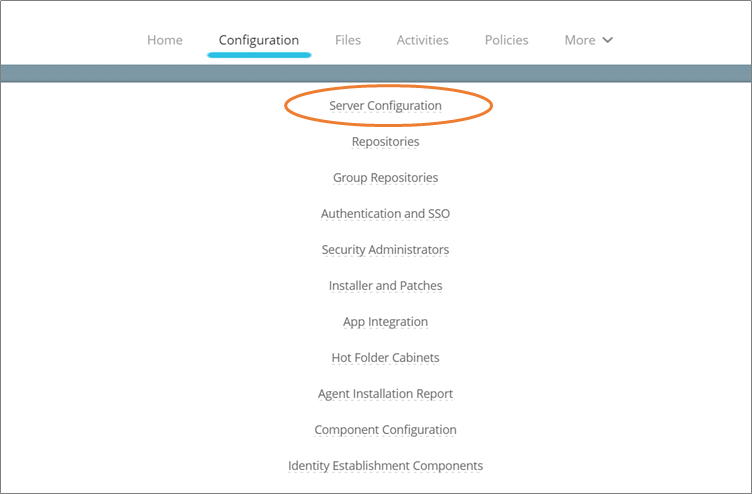
Log in as the System Administrator, go to the Configuration tab, and click on Server Configuration.
Policy Server Configuration
Application Details
- Organization name: Enter the name of your organization
- Application name: Enter the Tomcat application name
- Application URL (Primary): Enter the primary server URL of the Policy Server
- Application URL (failover): Enter the URL of the failover server
- Application URL (recovery): Enter the URL of the disaster recovery server
SMTP Configuration
- Server name and port: Enter the SMTP server name and port. This will be used for sending emails from the Policy Server (e.g. activity alerts)
- User ID and password: Enter the user ID and password for authentication with the SMTP server
- Secure connection using: Enter the encryption type for SMTP connection
- List of trusted domains if SSL certificate is self-signed: Enter the domains to trust in case of self-signed certificates (separate multiple domains with commas)
- Domain name for Active Directory authentication in Microsoft Exchange : Enter the NTLM domain name if Active Directory credentials are used to authentication in Microsoft Exchange
Email Notifications
- From Email ID: Enter the email ID to be used in the 'From' field in certain automated emails sent from the Policy Server (e.g. activity alerts)
- From Display Name: Enter the name to be used in the 'From' field in certain automated emails sent from the Policy Server (e.g. activity alerts)
- Email ID for verification: Enter the email ID that will be sent as a test email to verify the SMTP configuration
- Email ID list for license expiry: Enter the list of email IDs (multiple IDs can be comma-separated) that will be sent email notifications when the Policy Server license is about to expire.
- Use end user’s email in ‘From’ field for Seclore emails sent on users’ behalf : Choose whether to enable end user's email ID in the 'From' field of the email.
- Enter your internal domains where this feature is needed : Enter the list of email domains (multiple domains can be comma-separated) for which end user's email ID should be visible in the 'From' field of the email.
IFrame Domain List: Enter the authorized domains (separate multiple domains by commas) for embedding a Policy Server iFrame. The Policy Server portal can be displayed inside an iFrame only on these domains.
Seclore Online
- Seclore Online URL: Enter the URL of Seclore Online server for opening a protected file.
- Public Key Id: Enter the public key ID of Seclore Online.
- Public Key: Enter the public key for Seclore Online.
- Path of company logo (large): Enter the relative file path for the large organization logo displayed on the application loading and login screens
- Path of company logo (small ) : Enter the relative file path for the small organization logo displayed in the Seclore Lite Online Editor
- Display compliance messages to end users on login: Enable this to show compliance messages to users when they login
- Privacy Policy: Enter the path for privacy policy
- Terms of Service: Enter the path for terms of service
- Cookie Policy: Enter the path for cookie policy
Feature Configuration
Default protection options
- Classification (Outlook M365 Web/Mac): Choose whether to allow users to classify emails sent through Outlook on the web.
- Default Permissions: Choose the default permissions chosen for all protected files.
Request Access
- Request Access Feature: Choose whether to allow unauthorized users to request access to a protected file when attempting to open it
- Allow sharers to approve requests: Choose whether Sharers (users with Share permission) should receive access request emails to files, apart from the File Owner.
Email Protector
- Outlook Email Protection: Enable email protection for Microsoft Outlook.
- Smart Sharing feature in Outlook: Choose whether to enable or disable the Smart Sharing feature in Outlook
- Protect Body: Enable this to allow email body to be protected automatically
Outlook on the Web
- Protecting emails in Outlook on the web: Enable this to protect emails using Outlook on the web.
- Attachment size limit: Enter the maximum size supported for protection for protected emails in Outlook on the web. Larger sizes require a higher hardware configuration and network latency.
- Attachment HTML wrapping size limit: Enter the maximum size supported for HTML wrapping for protected emails sent using Outlook on the web.
Secure Email
- 'View Email' URL: Choose whether the URL should be linked to App Link Service or Policy Server.
- Link Expiry Duration: Enter the duration (in days) after which the 'View Email' link will expire. (The default link expiry duration is 30 days.)
- Email size limit: Enter the size limit to be applied to protected emails. Users will not be able to send protected emails larger than this. (The default size limit is 20 MB)
- Default permissions for protection attachments: Select the permissions to be applied on unprotected files attached to protected emails while replying through Secure Email from browser or mobile.
Seclore Email Template Configuration
- Footnote: Enter custom footnote for the email template.
- Footer Link - Privacy Policy: Choose whether to enable or disable the link to Seclore's privacy policy in the email template.
- Footer Link - Trouble viewing the email? : Choose whether the 'Trouble viewing this email?' link in the email template should redirect to Adoption Portal or Policy Server Online Help.
- Footer Link - Custom URL: Add a custom URL to the email template.
HTML Wrapping
- HTML wrapping protected files: Choose whether to "wrap" protected attachments in Seclore's special HTML format
- Size limit for protected file upload: Enter the maximum size limit supported for uploading a protected file to the Policy Server
- Size limit for HTML wrapped file upload: Enter the maximum size limit supported for uploading an HTML-wrapped file to the Policy Server
Universal Protection
- Protection for all file formats: Enable this to apply Universal Protection for non-standard file formats. This is set as Disabled, by default.
Watermark Configuration
- Line 1, Line 2, Line 3, Line 4, Line 5: Enter the watermark configuration for each line to be displayed when a protected file is open. The watermark can also contain dynamic text. The following parameters are available and will be replaced with actual values in real time when the file is opened:
- $USERNAME$: User name of the user opening the protected file
- $USERMAIL$: Email ID of the user opening the protected file
- $VIEWTIME$: Date and time when the file was opened
- $FILEID$: File ID of the protected file
- $FILECLASS$: File Classification of the protected file
- $LICENSECLIENT$: Organization name configured in the Policy Server
- Font Name: Choose the font for displaying text in the watermark. Four fonts are available: Arial, Tahoma, Verdana, and Times New Roman
- Font color and style: Enter the hash color code of the desired font color and enable bold or italic styles, if required.
- Opacity: Select the level of opacity for the watermark. A higher percentage would mean more opacity, which means a darker watermark.
- Line Spacing: Select the spacing between watermark lines.
Unsuccessful Login Attempts
- If user login is unsuccessful more than: Set the number of unsuccessful login attempts before locking the account for a limited period
- Within a span of: Enter the time duration within which the number of attempts entered above have to be made
- Block user for: Enter the time duration for which the user should be blocked
Two-factor authentication
- Issuer Name: Enter the issuer name for two-factor authentication.
- Current Seclore Policy Server Time (in GMT): This field shows the current time in Seclore Policy Server.
- Time lag with GMT: Enter the difference between GMT and the current Seclore Policy Server time (displayed above). Examples: If GMT is ahead of current Seclore Policy Server time by 7 seconds, enter value as '7'. If GMT is behind current Seclore Policy Server time by 16 seconds, enter value as '-16'.
Seclore Online
- Show download agent link: Enable it to show the link to download agent in the Online Viewer and Online Editor screens.
Activities and Audit Logs Online
- Auto-purge activities and audit logs: Enter the duration beyond which activity data and audit logs will be purged from Policy Server.
- Activity and data availability: Enter the duration for which activity data and audit logs should be visible on the Policy Server portal. This duration must be lesser than the previous one.
Seclore for SIEM
- Store historical data for: Enter the duration for which historic data must be stored for sending to SIEM systems.
Show permissions badge: Choose whether to display the Seclore Permission Badge in the Seclore Online Editor
Automatic login in browser when logged in to agent: Choose whether the user will be logged into the browser automatically if they are already logged in to the desktop agent
Restrict user to protect with pre-defined policy only: Enable to restrict users to protect files with a pre-defined policy only. Enabling this will disable some Seclore features such as File-level permissions, Outlook Email Protection, Smart Sharing etc.
Offline mode maximum duration: Enter the maximum duration for which a file can be accessed offline
Size limit for any file upload: Enter the maximum size of a file that can be uploaded to the Policy Server
File encryption key configuration: Enter the file encryption key size
Logging file Close activities: Choose whether Close activity of a file should be logged
Activity data availability: Choose how long the activity data must be available
Click Save to save your changes and Discard Changes to discard the changes.